
Wether you are a Python fan or not, this article is going to introduce you to the Django web framework. Django is a open-source Python Web Framework, which uses the model-view-template pattern (similar to MVC). Also, it includes other features, like an ORM (Object Relational Mapping) already configured, and the possibility to add modules (autenthication, RSS, sitemaps…). You can learn more about Django here.
This article will focus on creating a Restful API with Django Rest Framework, in order to be used for example with a front-end framework like React or AngularJS. I will focus on the backend configuration of Django. Installing Python and Pipenv
Let’s start installing Python. Is possible that you will have to add python as a environment variable if you are using Windows. In this case, read this.
Then, we have to install pip, a package manager for Python. We open a new terminal in a folder of your choice and we type the following
curl https://bootstrap.pypa.io/get-pip.py -o get-pip.py
python get-pip.py
Now, it’s time to install pipenv. What is pipenv? Pipenv is also a package manager, but it simplifies some things in the Python world, like creating virtual environments, and other useful stuff like managing dependencies, versions and deterministic builds.
$ pip install pipenv
Once it is all installed, we can begin with Django. Installing Django
Let’s create a new folder for our project, called django-demo.
mkdir django-demo
cd django-demo
Now, we have to install django.
pipenv install django
This command will install Django with pipenv, so it will create a virtual environment and Pipfiles. In Python, creating virtual environments is useful in order to avoid problems with libraries within your project. I recommend to learn more about virtual environments.
Then we enter this project virtual environment with
pipenv shell
You should see a little diference in the command line of your terminal if you are not in Windows.
Let’s create the django project with the following command
django-admin startproject djangodemo .
This will create a base project structure for Django. The manage.py file is the file you will use the most. You can run your server with
python manage.py migrate
python manage.py runserver
Also, we have to create an app for this Django projects. In Django, you can think an app is like an application in a webpage. For example, the ‘movies’ section in any webpage, will be a Django app. Let’s do this
python manage.py startapp movies
Finally, add this app to the Django configuration, in file djangodemo/settings.py
 # Application definition

INSTALLED_APPS = [
  'django.contrib.admin',
     'django.contrib.auth',
     'django.contrib.contenttypes',
     'django.contrib.sessions',
  'django.contrib.messages',
     'django.contrib.staticfiles',

     'movies',
]
Installing Django REST Framework
It’s time for the difficult part (difficult in comparison, until here this should have been a walk in the park!).
We will add Django REST Framework to our web application. It will simplify the process to create a RESTful API. As you know, use pipenv for installing it
pipenv install djangorestframework
And add it to the Django configuration
# Application definition

INSTALLED_APPS = [
     'django.contrib.admin',
     'django.contrib.auth',
     'django.contrib.contenttypes',
     'django.contrib.sessions',
     'django.contrib.messages',
     'django.contrib.staticfiles',

     'rest_framework',

     'movies',
]
We have to create some model for our Movies app. Django will use this model to create forms and to persist it in our local Database using ORM. We create a Movie model inside the file movies/models.py:
from django.db import models


# Create your models here.

class Movie(models.Model):
        title = models.CharField(max_length=100)
        year = models.IntegerField
And we create the table in our Database with the next commands
python manage.py makemigrations movies
python manage.py migrate movies
For now, in order to have rows for this movies, we will use the Django admin panel. Add the model to the djangodemo/admin.py file:
from django.contrib import admin
from movies.models import Movie

admin.site.register(Movie)
And create an admin user
python manage.py createsuperuser
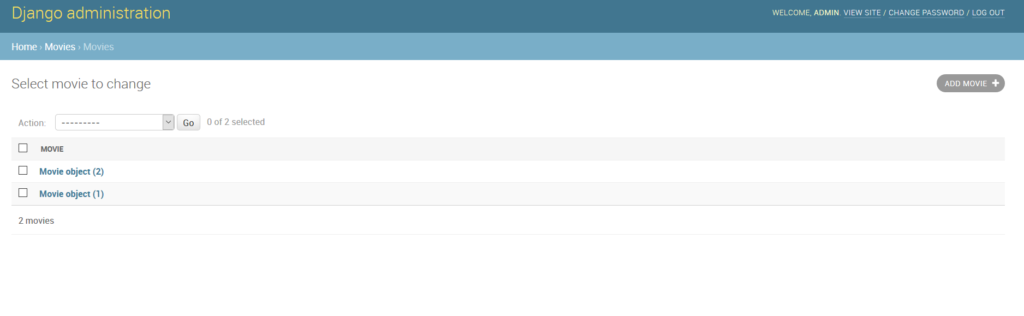
When you are finished adding the info por the superuser, you should run your server and enter the admin panel in http://127.0.0.1:8000/admin . Then, create some Movie rows in this view:
After this, we have to write some classes for Django Rest Framework in order to get our endpoints working. Let’s create a Serializer. This will serialize our model object to a JSON string. Create a file named movies/serializers.py and put in this code:
from rest_framework import serializers
from . import models


class MovieSerializer(serializers.ModelSerializer):
        class Meta:
                fields = ('id', 'title')
                model = models.Movie
We create then the Views. This Views will represent how we retrieve the objects and how we will serialize it.
In movies/views.py, add this:
from rest_framework import generics

from . import models
from . import serializers


class ListMovie(generics.ListCreateAPIView):
    queryset = models.Movie.objects.all()
    serializer_class = serializers.MovieSerializer

class GetMovie(generics.RetrieveAPIView):
    queryset = models.Movie.objects.all()
    serializer_class = serializers.MovieSerializer
Finally, we have to add the URLs pointing to these views.
In djangodemo/urls.py, add the following
urlpatterns = [
        path('admin/', admin.site.urls),
        path('api/movies/', include('movies.urls')),
]
You will have to create the file movies/urls.py, and finally add
from django.urls import path

from . import views

urlpatterns = [
        path('', views.ListMovie.as_view()),
        path('<int:pk>/', views.GetMovie.as_view()),
]
We are done! Now, you can runserver again and see our results typing these URLs:
http://127.0.0.1:8000/api/movies/

http://127.0.0.1:8000/api/movies/1
These view is the Django REST Framework browsable API, and is the default view accessing from your browser. When running your React application, you should get the JSON view.
You can view this example project on my Github.
This is how you create RESTful webapp with Django. You can also view how to create it using Spring Boot.