Restful webservices are commonly used these days when developing apps. Maybe you are using microservices architectures or you want your website to have a restful API for your users. In any case, this short post will guide you in the start of developing a RESTful webservice with Spring Boot.
First of all, let’s create a starter project with Spring Boot. Some IDEs have the possibility to create starter projects of Spring Boot (like Eclipse or IntelliJ IDEA) in a few clicks, but in case you don’t want to use this options, you can use Spring Initializr. In this site, we will select our Build and Dependency Management tool (Maven or Gradle) and then we will add the ‘Web’ dependency. This time we will use Java. Click the generate button, unzip the files and open it with your favourite IDE or Code Editor.

Check the pom.xml file and check you have the Web dependency:
<dependency>
       <groupId>org.springframework.boot</groupId>
       <artifactId>spring-boot-starter-web</artifactId>
</dependency>
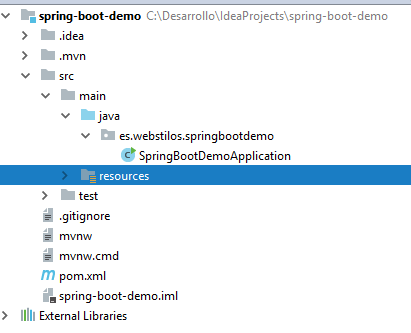
You also have to check your main application class, SpringBootDemoApplication. Obviously, you can rename it.
In this class, the @SpringBootApplication annotation does all the magic. Spring Boot searches all components in your classpath and creates Bean instances of all of them to use it in your application. Also, in a common Spring application, you should add the @EnableWebMvc annotation, but in Spring Boot and his EnableAutoConfiguration, adds this automatically when you add the have spring-webmvc dependency in your classpath. You can read more of this, in this link.
@SpringBootApplication
public class SpringBootDemoApplication {

       public static void main(String[] args) {
              SpringApplication.run(SpringBootDemoApplication.class, args);
       }
}
Let’s start building a Resource Controller for your API. First, let’s create some model. Create a new ‘model’ package and let’s create an Artist class.
public class Artist {

        private String name;
        private int born;

        public Artist(String name, int born) {
                this.name = name;
                this.born = born;
        }

        public String getName() {
                return name;
        }

        public void setName(String name) {
                this.name = name;
        }

        public int getBorn() {
               return born;
        }

        public void setBorn(int born) {
               this.born = born;
       }
}
Then, we create an ArtistService to retrieve these artists. In a real-world app, we should have a repository to retrieve artists from the Database, but for this example we will have an static list.
@Service
public class ArtistService {

        private List<Artist> ARTISTS = Arrays.asList(
               new Artist("James Alan Hetfield", 1963),
               new Artist("Bruce Dickinson", 1958)
        );

        public List<Artist> list() {
                 return ARTISTS;
        }

}
Check the @Service annotation from Spring. This is a stereotype annotation that tells Spring that this is a ‘Service’ class, and in fact this is also a Component, so Spring will create a Bean of type ArtistService for you so it can be injected later in another class.
Finally, we will create the Resource Controller, referencing this ArtistService.
@RestController
public class ArtistController {

     private final ArtistService artistService;

        @Autowired
        public ArtistController(ArtistService artistService) {
          this.artistService = artistService;
        }

        @GetMapping("artists")
     public List<Artist> getArtists() {
                 return artistService.list();
        }

}
@RestController tells Spring that this is a class that will listen to Http Requests, and @GetMapping mean that this method will listen to a GET request. As you can see, this class uses ArtistService, using Dependency Injection. Spring will inject the previously ArtistService instance created in this class.
That’s all the code for a simple GET. Now you have to run it. You can run the SpringBootDemoApplication main class from an IDE, or running the app with Maven from a Terminal, like this:
./mvnw spring-boot:run
You should see how Spring Boot starts your application in ‘http://localhost:8080'. Now it’s time to go to a web browser and type ‘http://localhost:8080/artists':
[{"name":"James Alan Hetfield","born":1963},{"name":"Bruce Dickinson","born":1958}]
Congratulations. You have your simple Rest app with Spring Boot running.
You can see the full project code in Github.